If Looks Could Kill

t was a very hot afternoon in Milan Italy. The sun was relentless and around 3 PM we headed back to our hotel after a rough day of touring. As we neared the Westin Palace Milano we came across a fashion photography shoot on the street. The crew was yelling at each other, maybe because of the heat or maybe just ineptitude. The model looked hot, flabbergasted and near passing out as she waited for the photographer. Last week I posted what I thought was the best of this series . However, I like this one also because her facial expression shows how she really feels about the whole situation. You can buy a print of this image at my commercial site by clicking here.

iflookscouldkill

The Model and the Cyclist

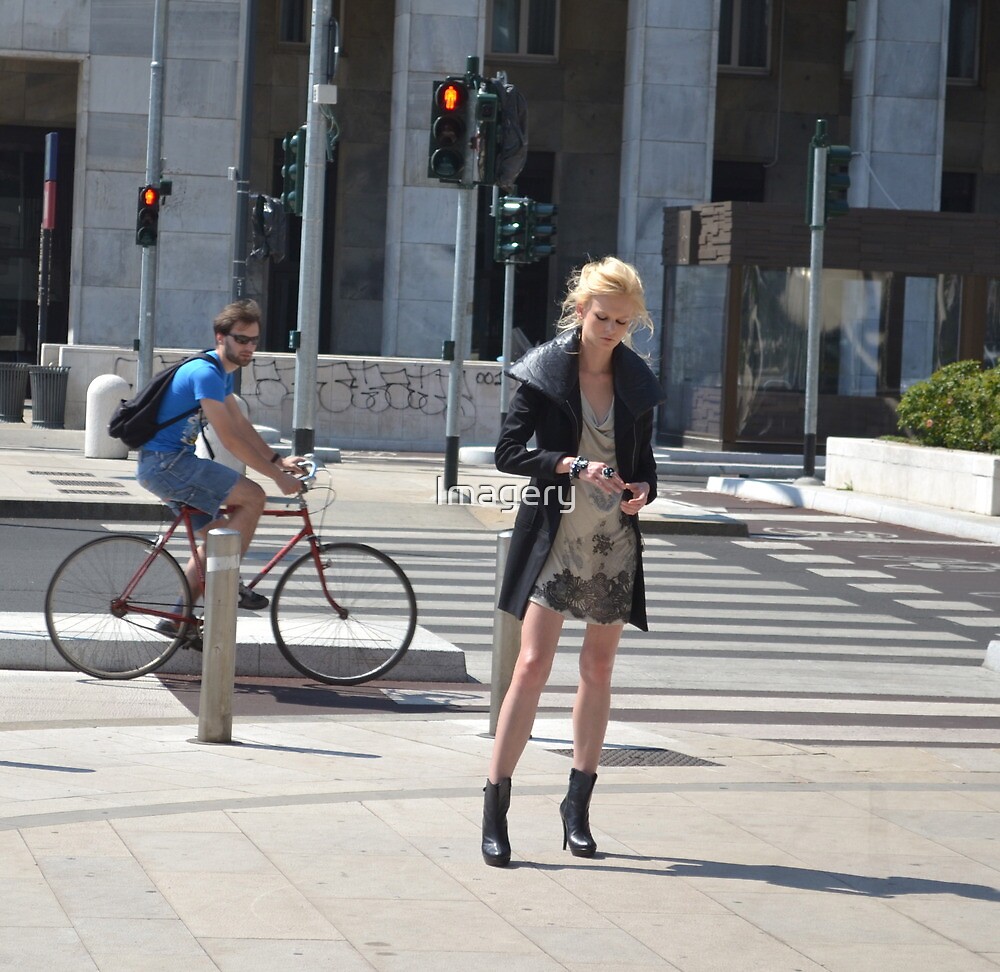
It was a very hot afternoon in Milan Italy. The sun was relentless and around 3 PM we headed back to our hotel after a rough day of touring. As we neared the Westin Palace Milano we came across a fashion photography shoot on the street. The crew was yelling at each other, maybe because of the heat or maybe just ineptitude. The model looked hot, flabbergasted and near passing out as she waited for the photographer. This gave me an opportunity to jump in front of the crew and get about 5 shots. This is the best one and you can purchase a copy of this image at my commercial site by clicking here.

themodelandthecyclist

The Model and the Cyclist

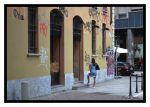
Graffiti and the Girl

While traveling through Italy last year I was stunned by the amount of graffiti. It was everywhere except churches. I did not see any church with graffiti and some areas had more than others. Some were wonderful works of art and some just gang signs. The other thing I noticed were a plethora of beautiful,fit and well dressed women. I felt most people in europe are in better shape than most Americans. This may come from walking and bike riding instead of driving. With gasoline at over $10 per gallon, most people walk and take public transportation. This image was taken in Milan near Il Duomo. You can buy a print of this image at my commercial gallery by clicking here.

Graffiti and Girl

Graffiti and Girl

Old School Montréal

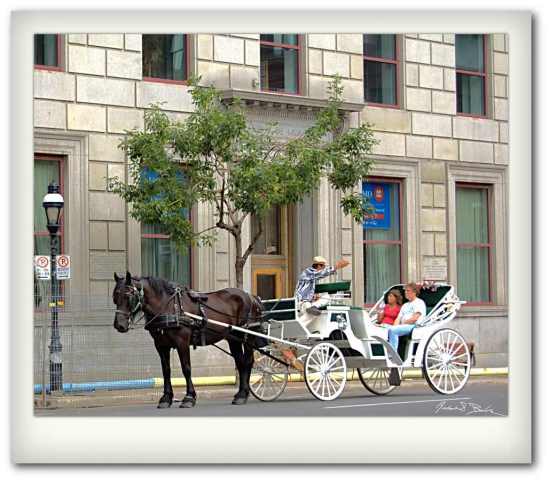
Québec has two major cities, Québec (City) and Montréal. When we first visited the provence of Québec, we went to Québec city because we wanted to see old French Canada. We then traveled to Montréal specifically to see the Jazz festival and we stayed in a modern high rise hotel. To our surprise, Montréal also has a wonderful old city which rivals Québec in history and European flavor. A good way to see the old city is to take a ride in a horse drawn carriage like these tourists. You can buy a print of this image on my commercial site by clicking here.

Horse and Driver in Montreal

Horse and Driver in Montreal

Controlling Camera Exposure

Today’s modern digital cameras are small wonders. They automatically control focus, sensitivity, exposure, flash lighting and in some cases even try to provide composition automation. Anybody can take perfect exposures at any time and some people never take their cameras of automatic settings. They may even call themselves “Photographers” without having a clue on how to adjust camera exposures. Don’t get me wrong, there is nothing wrong with using automatic settings. However, if you are a “photographer” you want to consider things like motion, depth of field and resolution when composing your pictures. To do that, you need to have some idea about how to manually adjust camera exposures to get the image you want. In this article, we will outline the three basic exposure controls; aperture, shutter speed and sensitivity (ISO) settings. Hopefully, it will help you think about planning your images more during capture and be less afraid to use manual settings. To see my commercial images for sale, just click here.

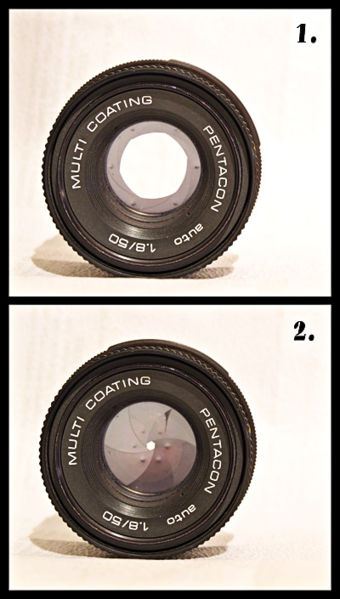
The first adjustment to consider is aperture. The aperture is the “hole” in the lens created by the lens iris. It mimics the eye in that your iris gets smaller when there is more “light” present. If the iris opening is smaller less light will strike the sensor. In the picture, the bottom lens has the smaller opening. The size of the iris is controlled by adjusting the F-stop. The larger the F-Stop number, the smaller the iris. The smaller the F-stop number will have a larger iris opening. F-stops are logarithmic in nature and each stop will either halve or double the amount of light. In automatic mode, the camera controls the iris, shutter speed and ISO sensitivity. Most digital Single Lens Reflex cameras (DSLR) have semi automatic mode where you can select the F-stop and it will automatically select shutter speed and ISO. Here is why you should care. A smaller the F-stop opening will produce a greater the depth of field. If you want to have the foreground and background in sharp focus you need to have a smaller iris opening or higher F-stop number. This is a decision a photographer needs to make. If I am taking a picture of a flower and I want it to stand out against the background of the trees I will want to use a more open iris to have a narrow depth of field and only have the flower in focus. In most scenic views you want to have maximum depth of field and it is rare that an automatic setting will allow this to happen.

Aperture

Lens Aperture

The next thing to consider is shutter speed. The shutter speed controls the amount of time the shutter is open to allow light to strike the sensor. The smaller number will let less light in to strike the sensor. Like F-stop this is a logarithmic arrangement. A shutter speed of 1/250th of a second will let light strike the films twice as long as 1/500th of a second. Why is this important? The faster shutter speeds will freeze the action more than a slower shutter speed. This picture was shot at 1/500th of a second to freeze the action of the batter and ball. The faster the action, the harder it is to freeze. To freeze a race car, I might need a shutter speed of 1/1000th of a second or faster.

shuter fast

Freezing the Motion

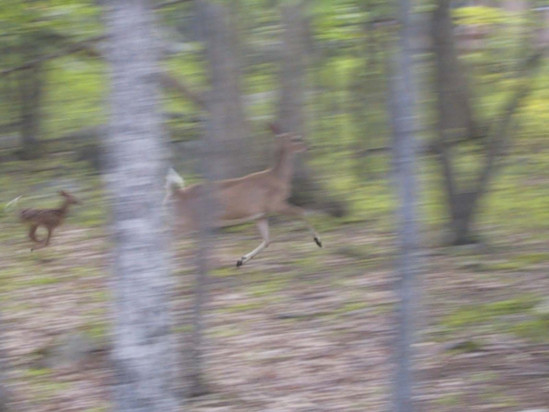
Sometimes you may not want to freeze the action. This image was photographed at 2 seconds so the shutter was open for two seconds. It was also shot on a tripod and the camera was panned with the image to semi –freeze the image of the deer and fawn. Shutter speed is another creative decision. It is impossible to take a picture like this with automatic settings. As with aperture, most DSLR cameras have a shutter priority setting where you select the shutter speed and the camera will adjust the ISO and Aperture to ensure correct exposure.

shutter slow

Creating Motion Blur

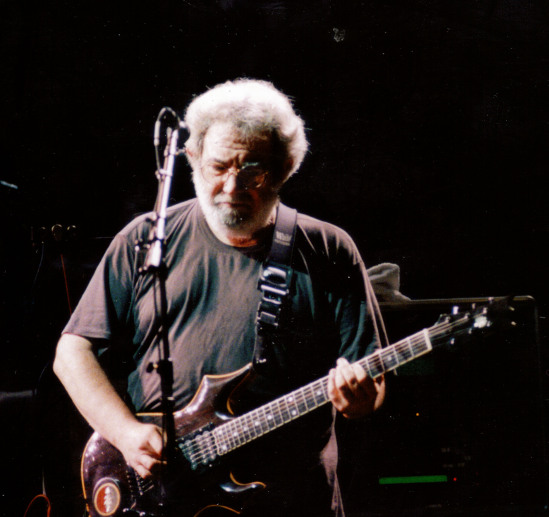
Finally, you need to consider sensor sensitivity. In the old days we used different films with different sensitivities. ISO refers to International Standards Association which sets standards on a lot of things including film sensitivity. This image was shot on film at an ISO of 1600 with no flash. ISO can be adjusted on all digital cameras. Point and shoot cameras may just offer a setting of HIGH ISO and LOW ISO. DSLR cameras use the same numbers we used with film. If the number is lower (100) it will have a finer resolution and “grain” but less sensitivity to light. The higher number will have a higher sensitivity to light. This is also in a logarithmic relationship. You may want to use a higher ISO where you can not use a flash (like this Grateful Dead concert) and still want to be able to take pictures. You may also want to use a lower ISO if you are taking a scenic view on a tripod where you can control all three elements so that you can get the best reproduction possible. There, that’s not so scary is it? So next time you get ready to take some pictures think about if you want to use the automatic settings or if you want to change from a picture taker to a photographer and begin to control your environment.

iso

Setting The ISO Sensitivity

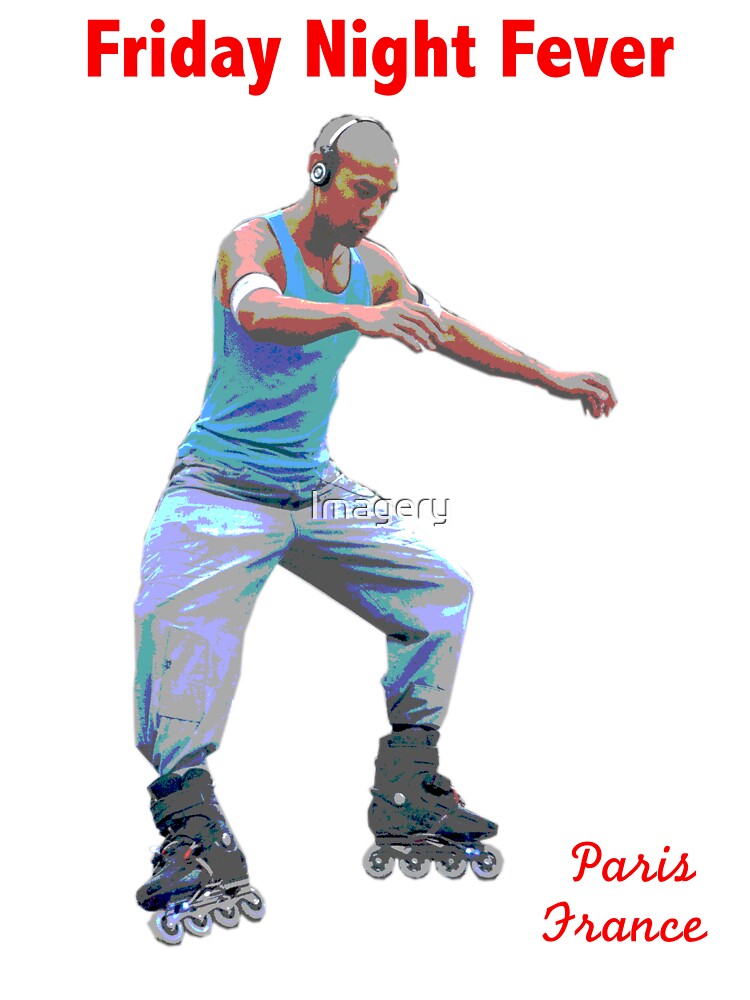
Lacing up for Pari-Roller

It’s Friday night in Paris. Thousands will gather at Gare Montparnasse to skate through the city at night. This couple is lacing up and getting ready for a wild ride through the streets of Paris. . You can buy a T-Shirt or Poster of Par-Roller

Lacing up

Lacing Up for Pari-Roller

at my commercial site by clicking here.

Thinking About Light

I use to start my color classes asking students, “What do you need to have color?”. The answers were varied and usually wrong. In order to create any image you need thee things; light, an observer and an object. One of the problems that novice photographers experience is they do not understand the language and terminology of Photography. What does it mean to “bounce” the light? What is a key light? What is a strobe light? It is hard for novice photographers to get help from more experienced photographers if they don’t speak a common language. I told a new photographer once that their picture would have been better if they used a hair light. They of course asked, what is a hair light? In this article we will explain some photography terms as they relate to light. It is not meant to be a complete glossary but rather to cover the key terminologies.
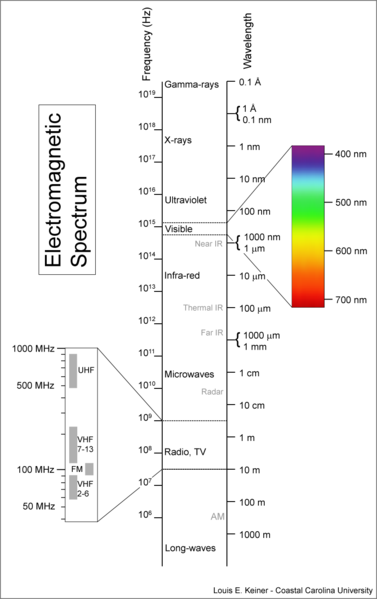
The Electro Magnetic Spectrum

The Electro Magnetic Spectrum

First, let’s discuss the nature of light. VISIBLE LIGHT is part of the ELECTROMAGNETIC SPECTRUM. Light, as we can see it, is a very small part of the spectrum from about 400nm to 700nm. Other parts of this spectrum are X-rays, gamma waves, radio waves, etc. While we cannot see X-Rays or Infrared rays, cameras can be used to photograph these waves. Visible light can be NATURAL LIGHT from the sun or ARTIFICIAL LIGHT from INCANDESCENT or FLUORESCENT light sources. Color properties of light are expressed in KELVIN notation. Natural light is about 5000K to 6500K depending on the angle of the sun and location on the earth. On a shady day, the sun may only be 4800K. Modern Digital SLR cameras have automatic WHITE BALANCE controls that automatically adjust for color temperature. Incandescent light has a color temperature of between 2800K and 3200K providing a yellowish green light. Regular fluorescent lights have a color temperature of about 2900K, however you can buy color corrected fluorescent lights that have a color temperature equal to daylight. These are used in print evaluation rooms and even in some studios.

Visible Light

Visible Light

A color GAMUT is a DEVICE DEPENDENT color space that provides a visual representation of the color characteristics of that particular device. The “shoe sole” large area represents VISIBLE LIGHT and the plotted area within shows the COLOR GAMUT of the device which is in this case an SRGB COLOR MODEL. Of course you can’t have COLOR without having an OBSERVER. If a tree falls in an unpopulated area does it make a sound? No, it makes a WAVE but you need a listener to have sound and you need an OBSERVER to have color. Since we all see color differently, the CIE created a STANDARD OBSERVER so that we have a common language when we discuss color. This is built in to all color models, color spaces, spectrophotometers and colorimeters.
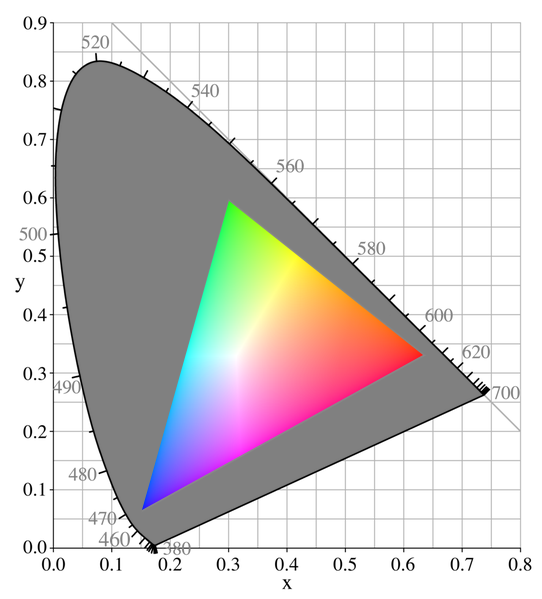
CIE Color Gamut

CIE Color Gamut

Now that we know a little about light, lets talk about LIGHTING. This is a standard studio portrait lighting set up. The KEY light is also sometimes called the MAIN light and it will create the most important shadows in the picture. The FILL light is used to fill the shadow, it may be the same strength as the KEY light and less strong to provide a deeper main shadow. The BACKLIGHT is sometime called the HIGH LIGHT or HAIR LIGHT and in a portrait setting will be used to provide a highlight in the lighting plan. The BACKGROUND light is use to light the background to give the image a more three-dimensional look.
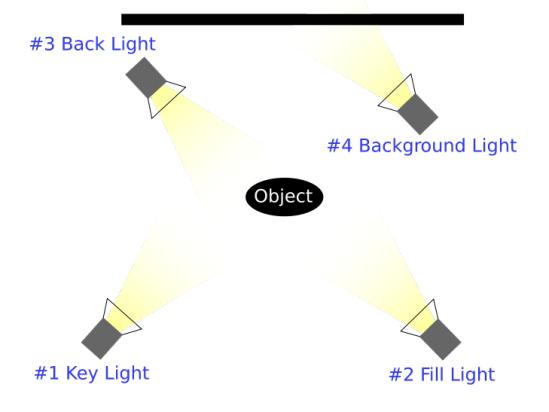
Four Point Studio Lighting

Four Point Studio Lighting

There is a huge variety in Studio lighting from the LIGHT BANKS used by movie studios and rock concerts to simpler setups for professional photography. Photographers CONTINUOUS LIGHTING options come in cooler fluorescent light banks color corrected to 6000K. There are also less expensive and hotter INCANDESCENT lighting that has to be color corrected with light filters or by adjusting the film or camera white point.
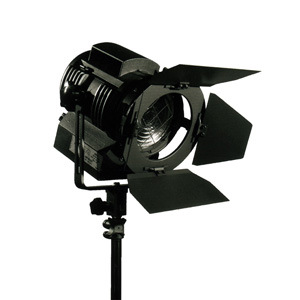
Studio Incandescent Light

Studio Incandescent Light

The more popular type of studio lighting is FLASH or STROBE lights that are only on during the exposure, which is usually 1/80th of a second. This creates a unique photographic problem. How can the photographer set up his studio lighting when it is dark? How can you evaluate the shadows and highlight created on your subject. Many professional strobe lights have a built in MODELING light, which is a low wattage incandescent light that you can aim on the subject to set your lighting angles. The modeling light may stay on during exposure. This will not create a color balance problem since the intensity is very low compared to the STROBE lights. You can also use regular incandescent studio light in combination with strobe lighting if your lights do not have modeling lights.
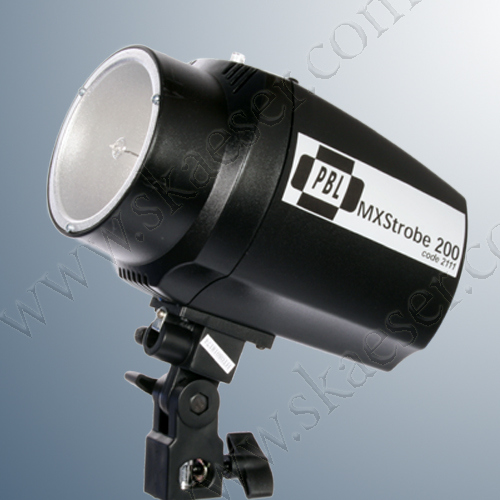
Studio Strobe Light

Studio Strobe Light

In studio light setups, strobe lights may have a main light and SLAVE units that are SYNCHED to go off when the main light is triggered. Photographers use UMBRELLAS and BOUNCE the light into the umbrella with the reflection for the umbrella used to light the subject. This creates a softer light. You may also use DIFFUSERS that go directly over the light to soften the light further.
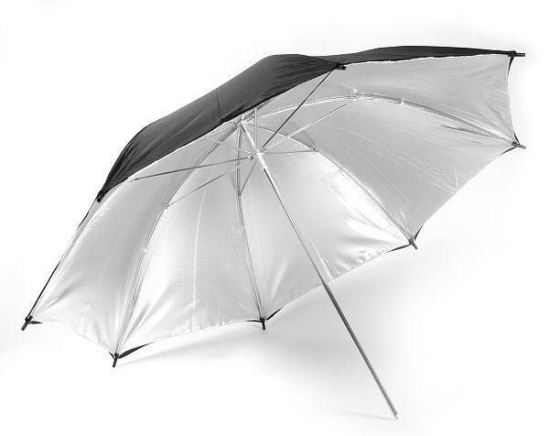
Studio Umbrella Bounce Light

Studio Umbrella Bounce Light

Experiment with lighting and capturing objects to develop your lighting skills. Have your friends’ model for you so you can practice your lighting skills. To see images from my commercial portfolio, click here.
Now with a PDF Preview

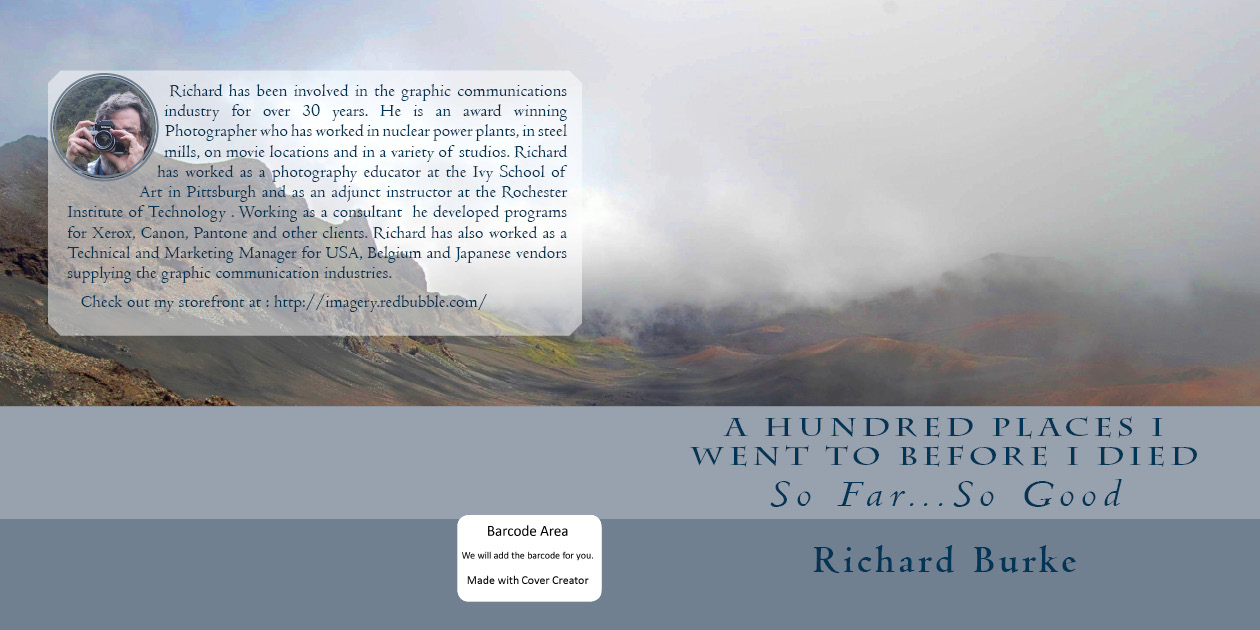
You can now download a PDF preview of “A Hundred Places I Went to Before I Died“. Although the book is on Amazon, to download a PDF preview simply go to CreateSpace by clicking here. . Eeven if you don’t buy a copy, it would be greatly appreciated if you “like” the book by clicking here. More likes, helps the books move up in the random search order. Thanks for your support!

A Hundred Places I Went to Before I Died.

A Hundred Places I Went to Before I Died.

Using the Zone System in Photography

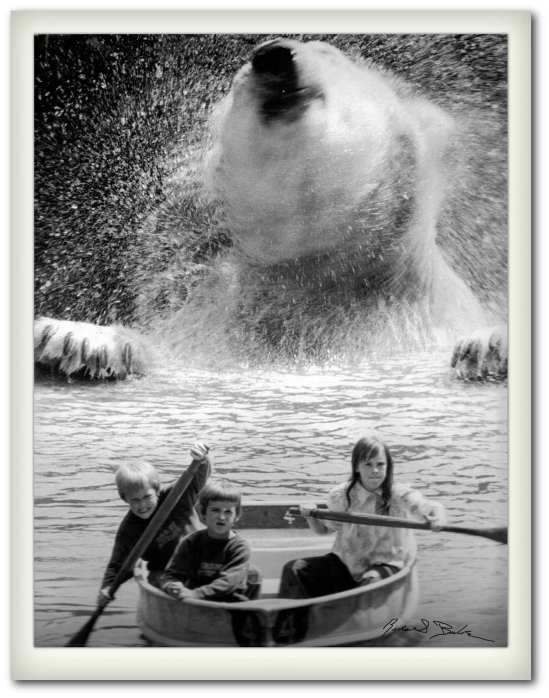
The Zone System is a photographic technique invented by Ansel Adams and Fred Archer in 1941. At the time, most Photography was monochromatic and Adams worked out a system for visualization, which he considered to be a creative technique. He believed that you should look at a scene and visualize how you want the tones to look in the image. From that point he could apply exposure science to get the perfect exposure on film. Musicians say that if you can hum a tune, you can play it. Ansel Adams believed that if you could visualize the image you could photograph it. The Zone System provides photographers with a method of defining the relationship between the way they visualize the photographic subject and the final results. Although it originated with black and white film, the Zone System is also applicable to black and white and color, negative and reversal, and digital photography. The zone system is still taught today in photography schools and is a relevant tool for digital and film photography and for color and monochrome images. The image below is a good illustration of the zone system and you buy a print of this award winning image at my commercial gallery by clicking here.

Row for Your Life!

Row for Your Life!

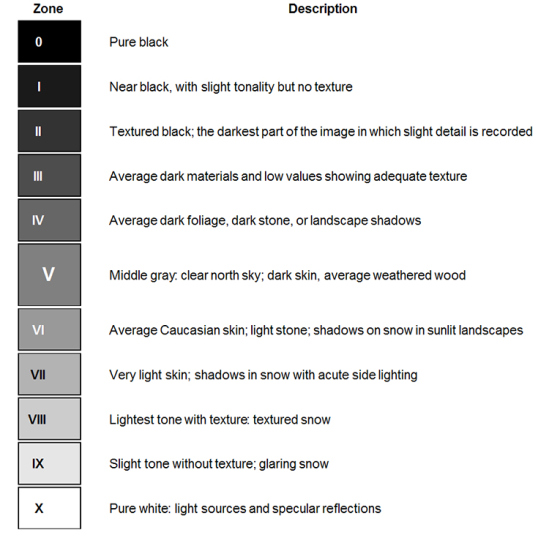
The simple tool that Adams and Archer developed is this 11-point monochromatic strip ranging from Step 0 to Step 10. Adams and Archer discovered that the eleven zones could be corresponded to exposure values. Exposure values refer to the logarithmic relationship between Aperture, Shutter Speed and Sensitivity. Sensitivity is the film or sensors ability to record light. In his book “The Negative” published in 1948 Adams discusses the scientific relationship between exposure value and the Zone System allowing Photographers to calculate how to adjust exposure to compress or expand the zones. Again, this all ties into visualization and knowing how you want tones to be reproduced.

Zone System Gradient lines

Zone System Gradient lines

To aid Photographers in visualization, Adams developed descriptions for each Zone. Keep in mind that the zone system strip is positive but Adams was working with negatives. The pure black of Zone 0 means that the negative was completely clear. This guide is just as relevant today as it was 70 years ago in helping photographers visualize photographic situations. Knowing that a person with light skin is Zone VII and that my meter is balanced for Zone VI tells me I need to close down one stop to achieve the optimum exposure for their skin. Keep in mind light meters today are much more sophisticated then 70 years ago and it is important to understand the operation of your light meter. In any case a light meter will not help you visualize a scene but the zone system will.

Zone System Descriptions

Zone System Descriptions

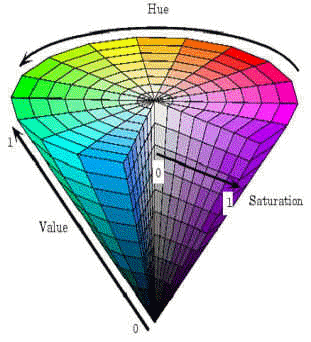
Although the Zone System was developed for monochrome images it can be applied to color photography as well. Keep in mind that device independent color models like HSV are based on hue, saturation and value. Value refers to the light/dark part of the color and when combined with saturation control the density of the image. The logarithmic part of exposure value applies here and so does the zone system. The greater the value, the less detail will be displayed in the image. It is more complicated than monochrome for sure but not when applied to visualization. Try visualizing your subject in monochrome and apply the zone system to that visualization. Many photographers and cinematographers carry a viewer that subtracts color from the scene. This allows them to make initial lighting an exposure decisions before considering the color elements.

Indexed Color Model

Indexed Color Model